Everything the app does, one part at a time. The same guide is in the app under Menu, Help &
About.
The basics
The map shows where you are on the railway, and the card below it tells you the line (ELR) and
your mileage. This is the core of the app.
The app is for information only. Verify your position against the physical mileposts and your
Safe System of Work (SSOW) pack.
The main screen
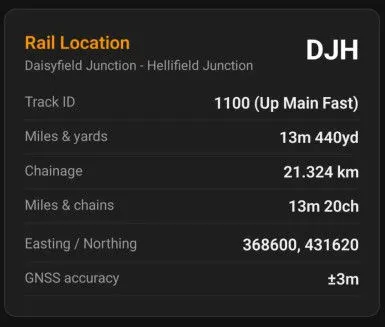
The Rail Location card with everything Pro unlocks: Track ID, chainage and the grid reference.
The banner at the top of the map shows the current mode (GPS Mode means it's showing where you
are) and your GPS accuracy, for example ±8m. On the map, railway lines are red and the line you
are currently matched to is orange. The small dots with numbers are mileposts.
ELR
The Engineer's Line Reference.
Track ID Pro
Which individual track you are on, for example 1100 (Up Main Fast). It appears once you've
zoomed in far enough for individual tracks to be shown, on the lines where the data has them.
The description in brackets is our reading of the standard numbering convention, so treat it as
a helpful label rather than an official description.
Miles & yards, Miles & chains
Your mileage.
Chainage Pro
The same position measured in kilometres.
Easting / Northing Pro
The OS National Grid coordinate.
GNSS accuracy
How good your GPS fix is. It shows "n/a" in Explore Mode.
In GPS Mode the Track ID is only named when you're far enough to one side of the tracks to be
certain, or on a single line. Where tracks run side by side they are only a few metres apart,
closer than a phone's GPS can reliably separate, so rather than guess, the app shows "N/A,
adjacent tracks too close" (tap it for why). Explore Mode always shows it. Never rely on the app
to tell you which track you are on.
On a few lines the underlying data is unclear, so you may see a red "mileage may be incorrect"
warning. That's expected on those lines. Always trust the physical mileposts and your SSOW over
the app.
The control buttons
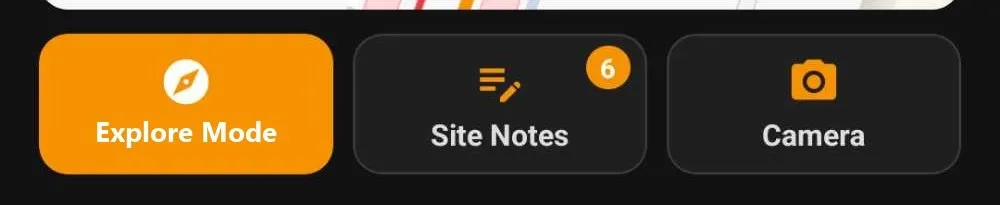
In GPS Mode: Explore Mode, Site Notes and Camera.
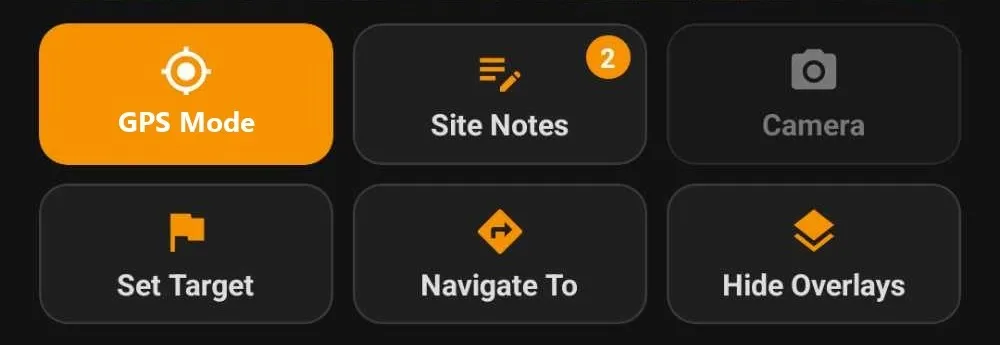
In Explore Mode a second row appears: Set Target, Navigate To and the Overlays button. Camera
is greyed out, because photos are taken in GPS Mode.
The buttons sit in a fixed grid below the map.
Explore Mode / GPS Mode Pro
Switch between following your live position and moving the map freely to look at a different spot.
Site Notes Pro
Record a set of on-site notes as you walk: drop pins, add photos and measurements, and export the set.
Overlays Pro
With one of your overlays (KML or KMZ files) loaded, shows or hides it on the map.
Camera
Take a location-stamped photo.
Set Target Pro
Drops a marker at the position of your cursor and shows you the direction and distance to walk to get there.
Navigate To Pro
Opens your phone's navigation app with the coordinates of your cursor.
Satellite
On the map itself. Switches between the plain map and an aerial view.
My Location
On the map itself. Takes the map back to your current location, which is handy after moving around in Explore Mode.
GPS Mode and Explore Mode Pro
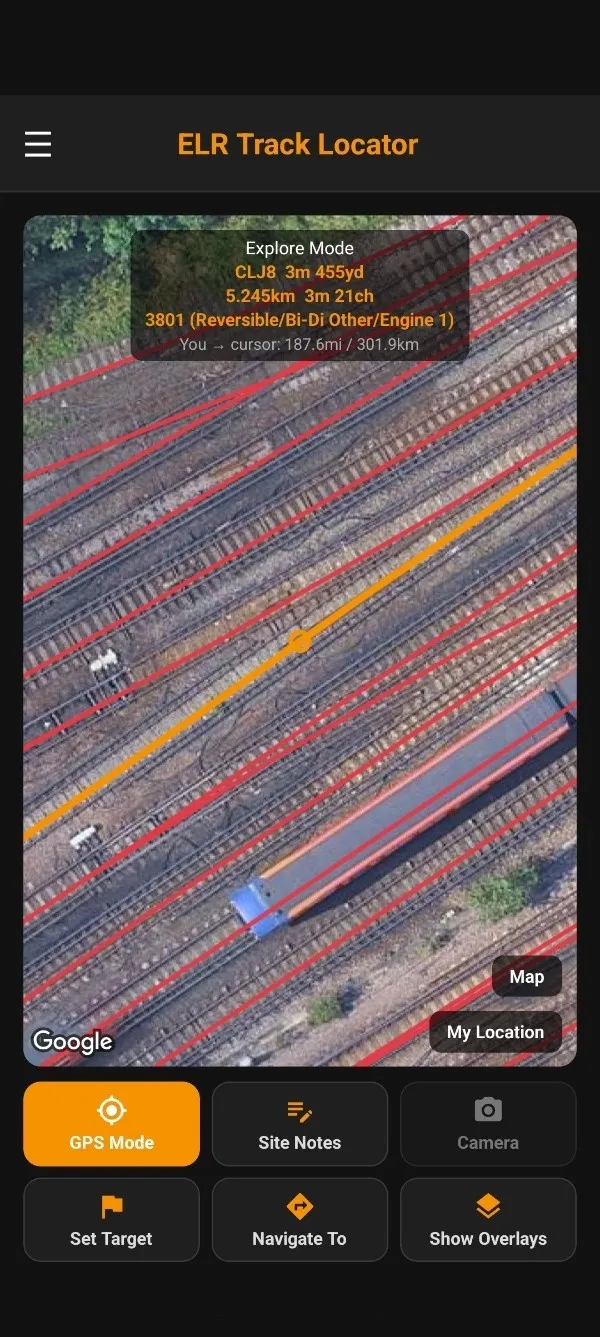
Explore Mode: the banner reads the ELR, mileage and Track ID at the cursor, and the distance from you to it.
GPS Mode is the normal mode. It shows where you are, live, and follows you as you move.
Explore Mode lets you look at a different spot without being there. The map fills the screen;
drag it so the cursor in the centre sits over anything you want (an overbridge, a structure, a
location down the line) and the banner reads the ELR, mileage and Track ID at the cursor. It
also shows the distance from where you're standing to the cursor, so you know how far you'd have
to walk to reach it.
As you zoom in, more detailed milepost locations and track layouts are shown. Zoom further in and
individual tracks appear, where the data has them. In Explore Mode the cursor position is exact,
so the Track ID always shows.
Tap GPS Mode to snap back to your real position.
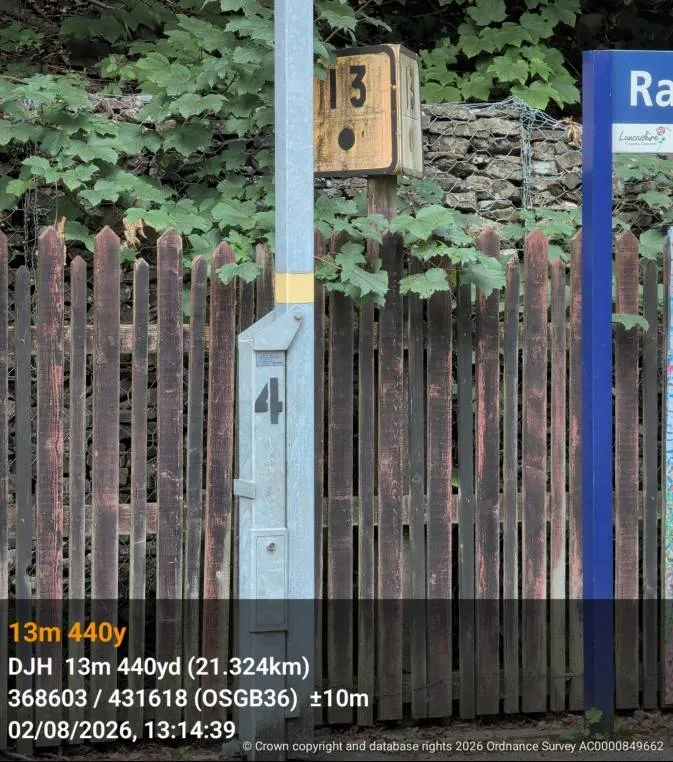
Location-stamped photos
A photo as it saves to your gallery: the milepost in shot, and the ELR, mileage, grid reference
and time stamped on it.
Tap Camera, type a short label if you want (for example "Signal MP212"; labels are Pro), then tap
Take Photo. The photo saves to your phone's gallery with the ELR and mileage stamped onto it,
and with Pro the chainage and grid reference as well.
Photos can only be taken from the GPS Mode screen, with a current GPS fix.
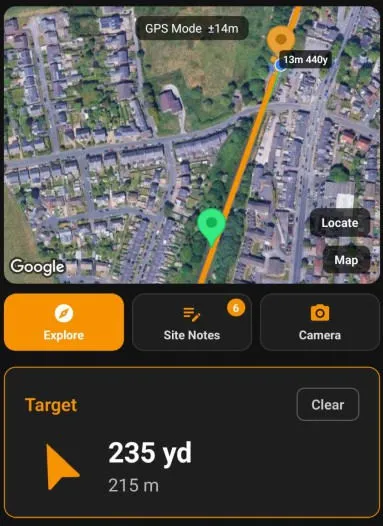
Setting a target Pro
Walking to a target: the green marker on the map, with the arrow and the distance counting down
below it.
In Explore Mode, put the cursor over a spot and tap Set Target. A card appears showing the
direction and distance to that point from where you actually are. It updates as you move,
counting down the distance until you reach your target. Tap Clear on the card to remove it.
While you're walking, the arrow uses your direction of travel rather than the phone's compass.
Steel rails and overhead line equipment upset a compass, so this is the more reliable of the two
on the railway. Stand still and it falls back to the compass.
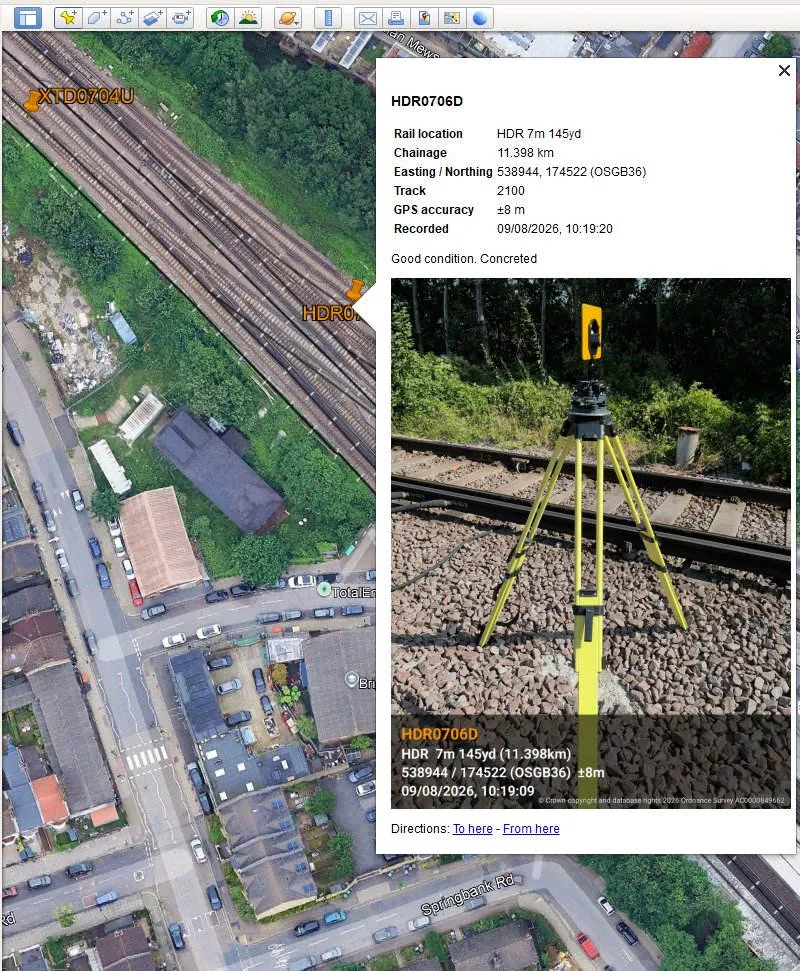
Site Notes Pro
A pin from an exported set, opened in Google Earth on a PC. Its rail location, grid reference and
photo all travel inside the .kmz.
Site Notes turns a walk of a site into a record you can share. As you go, drop a pin at anything
that matters: a defect, an asset, an access point, a work area. Each pin is stamped with its ELR,
mileage and grid reference. Add a name, notes and photos, measure between pins, then export the
whole set as a .kmz to send to the office or open in Google Earth.
Tap Site Notes in the button grid (or Menu, Site Notes) to start. The map switches to Site Notes Mode.
Manage Site Notes
Create a new set, or open, export or delete an existing one. Everything you record goes into the set that's open.
Pin My Location
Drops a pin where you're standing, using your live GPS position.
Pin at Cursor
Drops a pin at the map cursor: a spot you can see but aren't standing at.
View Pins
Lists the pins in the open set. Tap one to edit it.
Measure
Shows the straight-line distance between any two pins in the set.
Exit Site Notes
Leaves the mode. Your set stays saved; reopen it any time from Manage Site Notes to carry on.
When you drop or edit a pin you can attach photos. They're location-stamped just like the main
Camera, and the full-resolution original goes to your phone's gallery while the app keeps a
smaller copy in the set, so deleting a set never loses your original photos.
When you're done, open Manage Site Notes and choose Export. The set is packaged as a .kmz (pins,
notes and photos together in one file) and handed to your phone's share sheet, so you can email
it, save it, or send it however you like.
Open the file on a computer in Google Earth, or any software that reads KMZ, and every pin sits
at its real position on the railway. Click one and its photos, name and notes open with it.
Nobody has to match a folder of photos against a list of grid references, and nobody needs the
app to read it.
Site Notes is a record-keeping tool, not a survey-grade tool. The accuracy of dropped pins
depends on your phone's GNSS hardware and your current GNSS accuracy.
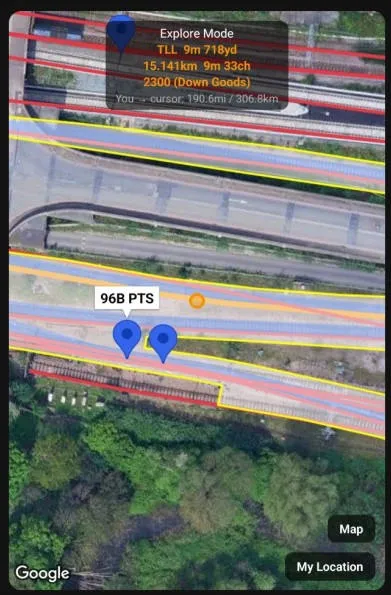
Map overlays Pro
A site KMZ drawn over the railway in Explore Mode, with the banner reading the mileage at the
cursor.
Overlays put your own drawings on top of the railway map. Import a KML or KMZ file (work areas,
possession limits, access points, signal numbers, a mark-out, anything your office already
produces) and it's drawn over the map in the right place, under your live mileage.
This is the other half of Site Notes. Plan the job at a desk, export a KMZ from Google Earth, and
take it out onto the track: instead of matching a printed plan against what's in front of you,
you see your own position moving against the drawing. Walk the site, record what you find with
Site Notes, and export that back as a KMZ the office can open alongside the original.
Menu, Map Overlays. There are two slots, and you can use both at once.
This session only
Cleared when you close the app. For a single shift in one area.
Always-on overlay
Reloads every time you open the app. For a project you're on for months.
Go to
Jumps the map straight to the overlay, useful when you've imported something for a site you aren't at yet.
Overlays button
In the button grid below the map, shows or hides the loaded overlays without unloading them.
Your file keeps its own colours, with one exception: the app already draws railway lines in red
and your matched line in orange, so anything red in your file is shown in blue and anything
orange in purple. Every other colour is left exactly as you drew it.
Overlays show your own data. The app doesn't check it, correct it or supply it. Make sure the
file you carry is the current one, and never rely on it in place of your SSOW pack.
The menu
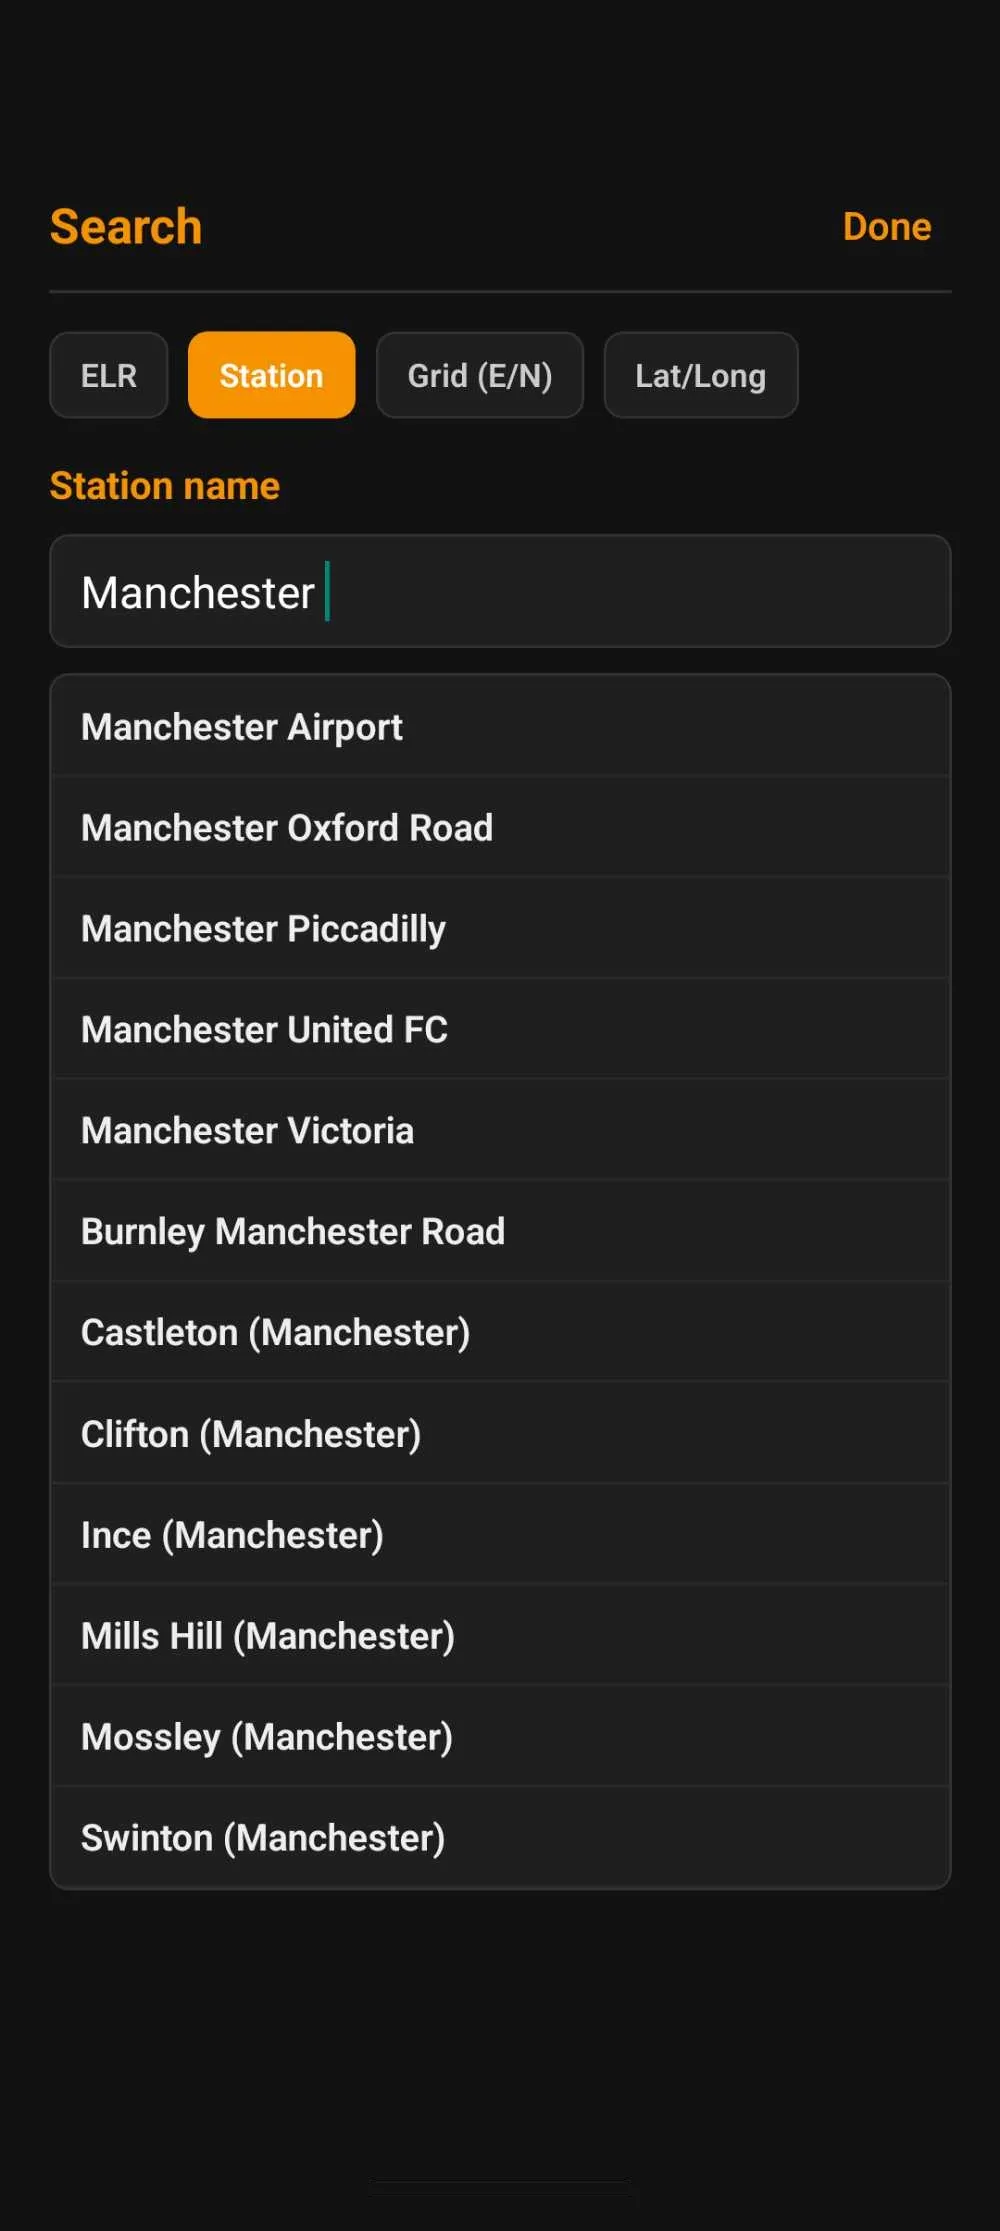
Search, finding a station. You can also search by ELR and mileage, grid reference, or latitude and longitude.
Mileage Calculator
Convert between miles and chains, miles and yards, and kilometres.
Search Pro
Jump straight to a place in Explore Mode: an ELR and mileage, a station name, a grid reference, or a latitude and longitude.
Map Overlays Pro
Import your own KML or KMZ file to draw over the map.
Site Notes Pro
Open, export or delete your saved Site Notes sets.
Upgrade
Start a 14-day Pro free trial and see your plan. Once you've subscribed, plan management moves into Settings.
Settings
Battery Saver (slows GPS updates to save battery), photo brightness and, once subscribed, your subscription.
Help & About
This guide, what's new, where the data comes from and when it was last updated, the safety notice, and how to get in touch.
Good to know
Offline
The railway data is built in, so no signal is needed once installed, other than for the map.
Accuracy
The track data is accurate to about ±1.5m, plus the accuracy of your own phone's GNSS hardware and your current GNSS lock.
Feedback
Spotted a wrong mileage, a bug or something confusing? Email
clyon.industries@gmail.com. A screenshot and your approximate
location is plenty.